Bacteria's project - Modding a GP2x....FINISHED

Trying to get homebrew running on your PSP? Want to add a screen light to your Game Boy? Trying to figure out how to work your GP2X? By popular demand, discuss it in here! (This forum is for pre-built handhelds, NOT custom made portables!)

Moderator:Moderators

Post Reply
User avatar
bacteria
Portablizer Extraordinaire
Posts:3984
Joined:Fri Apr 20, 2007 12:14 am
Location:Hampshire, UK
Contact:

Post by bacteria » Fri Feb 01, 2008 3:08 am

khaag - Many thanks for the kind comments.

Sure, no problem, video below. Please excuse the quality, my other camera (this one) only records in 320x240 mode, and the vids come out a bit dark. In other words, the picture quality sucks!

I had to hold the system at an awkward angle to get the system in and not my arm. The rotation is even smoother normally. I find the best method is as per the pic, using the sides of my thumbs.

In the short video, I point the GP2x to MAME, run it and load Galaga. The Galaga ROM goes through its initial blocky moving screen stuff before starting the game. This is what all the blocky multi-coloured blocks are in the video - some old games did this prior to starting, a self-test for the old arcade systems, if you like.

When the front screen starts, I press one of the buttons at the bottom to "insert money", then start the game. You will notice that only the very top of your ship is visible, which is useless, so I rotate the screen, then press the left and right shoulder buttons at the some time and the MAME emulator rotates the screen to portrait orientation to match the way I turned the screen. I then pump a few shots into the aliens for a few seconds, proving the controls work.

I have turned the system around about 4 or 5 times now since last closing the case, works reliably and smoothly now, and wires aren't getting snagged, which is important.

Anyway, apart from the fact I am holding the system awkwardly (so not using it optimally), you get an idea for how it works:

Image

Off to get 2-3 hours sleep now; just back off night shift; spent an hour messing about trying to get a half-decent video done and uploaded, so I am rather tired at the moment. I intend to spend 2-3 hours this afternoon on the project so should have something meaningful to post later.
Image

User avatar
khaag
Senior Member
Posts:2261
Joined:Sat Mar 18, 2006 7:54 pm
Location:C eh N eh D eh
Contact:

Post by khaag » Fri Feb 01, 2008 3:32 am

That is very cool, my friend. :) Thanks for the vid!

Question though: I noticed that you had to press the shoulder buttons simultaneously to get the screen to change modes... What exactly is the Q-tip/foil rig for? I thought it was to get the screen to change automatically? Maybe I missed something along the way...
[url=http://thekevbot.com]Portfolio[/url]
[url=http://twitter.com/thekevbot]Twitter[/url]
[url=http://blog.thekevbot.com]Blog[/url]

User avatar
bacteria
Portablizer Extraordinaire
Posts:3984
Joined:Fri Apr 20, 2007 12:14 am
Location:Hampshire, UK
Contact:

Post by bacteria » Fri Feb 01, 2008 9:41 am

khaag wrote:That is very cool, my friend. :) Thanks for the vid!

Question though: I noticed that you had to press the shoulder buttons simultaneously to get the screen to change modes... What exactly is the Q-tip/foil rig for? I thought it was to get the screen to change automatically? Maybe I missed something along the way...
Rotating the screen can't change the orientation of a game, that is down to the software of the game itself. In MAME on the GP2x, you can rotate the orientation of the game being played by pressing the two shoulder buttons at the same time, however if you do this, then the controls you use rotate too, so for example, you press the D-pad right then instead of D-pad down (landscape mode). Old-school arcade 1980's games were sometimes portrait (Mappy, 1942, Galaga, Pacman, etc), so if you play a portrait game on a landscape screen you get a small play area, this is why MAME on the GP2x has a mode to play games in portrait mode. On the video above, you lose most of the ship in landscape mode on Galaga, and some of the graphics are stretched, in portrait mode it is perfectly in proportion and as originally intended.

By rotating my screen, I re-orientate what happens when you press a D-pad direction via my cotton buds in tin foil. It is a basic logic If..then..else gate. For example:

IF press D-pad down direction, THEN if orientation is landscape tell GP2x to register down pressed, ELSE register right.

In effect, it replaces needing to flick 6 switch circuits (3 unique switches) as I had originally, by rotating the screen assembly.

Image Image
Image

User avatar
bacteria
Portablizer Extraordinaire
Posts:3984
Joined:Fri Apr 20, 2007 12:14 am
Location:Hampshire, UK
Contact:

Post by bacteria » Fri Feb 01, 2008 10:51 am

I don't know how much project time I will get until Monday, probably not much, however I intend to spend a lot of Monday on this project.

Started on the corners, decided to use the cardboard inner tube from Xmas wrapping paper (I could have used the card from the tube from toilet paper equally), three layers of this makes a strong piece and three layers thick is thick enough to be secured inside the case and also equal the thickness of the perspex, so the outside part is exactly the same height as the outer perspex. I just need to finish the top level to make sure it is level with the perspex top and bottom.

Image

Image

The perspex sides will be covered by the same thick paper as the front and bottom of the case will be; the corners will be painted - this will look nice. The slight contrast between rough of the corners and smooth of the sides will compliment each other too.
Image

User avatar
bacteria
Portablizer Extraordinaire
Posts:3984
Joined:Fri Apr 20, 2007 12:14 am
Location:Hampshire, UK
Contact:

Post by bacteria » Wed Feb 06, 2008 1:22 am

One large progress post, this site wasn't up yesterday or the day before (usual problems I guess). I had to make this log in Notebook and copy into the forum when the site was up again!

Corners done, all smooth. It doesn't matter that it looks "layered", this will be concealed with the "wallpaper" top.

Image

I had to put in a couple more screw positions on the back of the case to keep in completely flat against the sides.

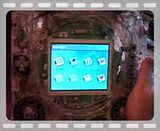
Final pic before I start with the case topping:

Image

Yes, everything seems complete with the system now, it is a matter now of starting to make it look pretty. I will leave covering the back until last as it is handy at the moment to check how things are inside when I rotate the screen.

I need to know where the existing tact switches are so I can cut out appropriate holes in the mounting board. I do this with a CD marker pen on a piece of spare acetate I have lying about. I moved the acetate off the system in the pic so you can see it.

Image

I cut out a piece of mounting board a couple of inches larger than I need, and marked out the center of it (where the screen will go). I tried before to use a standard school type compass but it was very hard to get a circle accurately - just as I remembered from the mid 70's when I used one at school.

At a recent car boot sale, I bought a compass navy captains use to plot their ship's course on maps - a proper one - these use a metal screw to adjust the distance between the two ends. I bought it for just £1, with this project in mind!

The two ends of the ship's compass are blunt, so I drilled a small hole in a piece of spare perspex and hot glued it in place in the centre of the mounting card and hot glued a craft knife to the other end.

Image

...and started to cut out a circle, cutting through the mounting board...

Image

I ended up with a perfect circle, no fuzzy bits. Worked like a charm! :)

Image

Cut-out done for the screen, glued (general purpose UHU glue) to the perspex above the screen.

Image

I put the acetate trace and put it on the mounting board

Image

This is not final, there will be a thick paper covering over the top. You can see how much nicer the turning circle is now. The card is bigger than the system, it will be smaller than this!

It is glued in place, looks nice. The area around the D-pad will be covered by the thick paper, if you remember, I made the D-pad surround the same height as the mounting board (otherwise the D-pad cross would be too recessed to use properly).

Image

Another view:

Image

I had to move the cut-out a bit, so I could rotate the screen fine. It rotates fine, sticks slightly but only slightly (the mounting board is very tight), but rotates fine, and stays in place nicely when done. I just rotated the screen four times to check all ok before the glue finally sets.

That's better, fairly crudely cut the excess mounting board from the case, when the system was upside down. It doesn't matter that the edges are a little rough, bear in mind there will be another layer on top of this before it finishes.

Image

Speaker grills - rather than the normal perf-produced holes, or speaker grills, I thought it funky to have the speaker grill "solid". On my BigBoy Advance project I didn't use grills but used a piece of paper (80gsm) and painted it; the sound quality was excellent and not muffled. On the PDA, I tried this with thick paper, it made a bit of a difference, but fine.

I glued (UHU glue) a thin piece of crepe paper (about 40gsm) onto each speaker hole and glued the overlaps down. Again, it doesn't matter about this look, it will be covered by the external paper sheet.

Image

I am using slim watch batteries as the system buttons, as they are really solid, and make great contact over the tact switches. I will paint them so they look nice.

Image

Image
Image

User avatar
bacteria
Portablizer Extraordinaire
Posts:3984
Joined:Fri Apr 20, 2007 12:14 am
Location:Hampshire, UK
Contact:

Post by bacteria » Wed Feb 06, 2008 1:22 am

Update:

Had to trim a couple of millimeters here and there on the turning circle of the mounting board, nothing much, but this improved the screen rotation further. I am happy with it now.

I spent about 3 hours making a paper template for the cutout for the front (final) covering this morning; making space for the buttons, etc. I nearly have their exact positions now, then I will print this onto the finished paper and carefully cut the shapes out. I will then only have to stick it to the front, after making the sides, make the middle part and the rear - project completed then. I should have this project done by mid next week for sure. I should also be able to cover the rear of the case too, as I have rotated my screen several times now and it works great; although I won't glue it down, rather it will be secured by the screws going into the case (ingenious, allows me to remove it if I need to, and I can see all the wires are safe before closing the case this way).

I need to make my wife a bookcase, from scratch, no big deal, but will take most of a day to do; then I will start my new project, as posted in Forum 42. I got my supplies from Maplin I needed (eg shrink tubing, 8mm tall mylar 50mm speakers, etc) and the Li-ion cells and chargers. This project will start in the N64 forum as the first console I will make the system compatible with is the N64.
Image

User avatar
bacteria
Portablizer Extraordinaire
Posts:3984
Joined:Fri Apr 20, 2007 12:14 am
Location:Hampshire, UK
Contact:

Post by bacteria » Fri Feb 08, 2008 5:11 am

Finished making the template, cut out the thick paper from the sheet to A4 size and printed the template onto the card with my printer. I then carefully cut out the shapes, made sure it was fine, and UHU glued it to the mounting board. Before I did this, I painted the tact switches, so I don't see any shiny colour next to the buttons, I want it all black.

The sheet is on the GP2x system at the moment, I need to trim the left and right sides down to meet the sides of the case. I also need to put the buttons in and glue them in place - I will use what's called "serious glue" which gives a far stronger bond than hot glue can; I need to stick metal batteries (buttons) to plastic tact switches after all.

I also need to get the middle done too, it looks quite nice as it is, as black, but I want to make it patterned (you will see what I mean later).

Anyway, incomplete, will look far better at next stage, but here is a pic at the moment:

Image

I am fast running out of time for today, I will get the buttons glued in place, but that is all. Spending the weekend with my wife, and working; however I will have project time Monday-Thursday, so expect to complete this project Tuesday....

update - (I know the screen is slightly at an angle at the moment) - buttons in place, trimmed the sides down. I will overlay pieces on the sides to make it nice, so the slight rough edges at the moment don't matter. I also need to do a little tidy-up of the small speaker circles with a black felt pen to hide the minor jags.

Image
Image

User avatar
dudex77
Posts:1499
Joined:Thu Nov 16, 2006 10:43 am
Location:Spain
Contact:

Post by dudex77 » Fri Feb 08, 2008 9:35 am

That's pretty nice! Has it not kind of ruined the portability of the GP2X though?
Kurt_ wrote: I would use tact switches but I want the mushy feel. Mushy = God. (I typed that correctly).
Image

User avatar
bacteria
Portablizer Extraordinaire
Posts:3984
Joined:Fri Apr 20, 2007 12:14 am
Location:Hampshire, UK
Contact:

Post by bacteria » Fri Feb 08, 2008 10:33 am

dudex77 - Thanks. Yes, it has made the system less portable as it can't run off batteries - according to the GP2x forum, the GP2x after a while can develop a faulty capacitor, which drains battery power dramatically (as I had).

The only thing which sucks with this project is that TV-out isn't compatible with all the games on the GP2x; some flicker, some shake, some lose some info off the screen. Fortunately, the key emulators (MAME, Pictodrive (MegaDrive) etc work great. I will compile a list at a later date. I had a good game of HellFire on Megadrive earlier (I suck at it, but it was entertaining).

I am not happy with the buttons I made, I will re-do them, probably like I did with the PDA project.

When I do my next project I will sink the tact switches under the case and be able to make better buttons then.
Image

User avatar
Negative_Creep
Posts:1093
Joined:Mon Dec 31, 2007 3:04 pm
Location:New Crack City
Contact:

Post by Negative_Creep » Sat Feb 09, 2008 3:09 pm

Not feeling the button layout much, sorry.

Everything else is looking damn nice though.

User avatar
bacteria
Portablizer Extraordinaire
Posts:3984
Joined:Fri Apr 20, 2007 12:14 am
Location:Hampshire, UK
Contact:

Post by bacteria » Sat Feb 09, 2008 9:54 pm

Negative_Creep wrote:Not feeling the button layout much, sorry.

Everything else is looking damn nice though.
No problem, personal choices. On the GP2x you tend mostly to use A and B buttons, not many games also need others (X, Y), the A and B buttons are in the right, and most comfortable place on the casing.

I hadn't expected to need two sets of volume controls, this is fine, but not ideal.

I prefer to sink the tact switches inside the case now and use proper buttons, I will do this on my next project - too late on this project though to implement. I am using this project more as a "final learning ground" before my next, and major, project.
Image

User avatar
bacteria
Portablizer Extraordinaire
Posts:3984
Joined:Fri Apr 20, 2007 12:14 am
Location:Hampshire, UK
Contact:

Post by bacteria » Mon Feb 11, 2008 4:07 pm

Project finished. BenHeck site is up and down at the moment; will update final installment tomorrow on it; in meantime, you might like to look on the GP2x forum where I posted final pics....

http://www.gp32x.com/board/index.php?sh ... ntry586315
Image

User avatar
bacteria
Portablizer Extraordinaire
Posts:3984
Joined:Fri Apr 20, 2007 12:14 am
Location:Hampshire, UK
Contact:

Post by bacteria » Tue Feb 12, 2008 2:41 am

Project finished.

This project has been added by the GP2x web site on their main page - http://www.gp32x.com/ Image

I had concerns about the buttons before after having to change tactics, however they worked out really well and responsive - really nice. What I did was to cut out a small square of mounting board to the size of the tact switch button and stuck it on (same height as the casing then). I then stuck on the circular cutout from the cut out the hole earlier from the holes. The result is a flat button, responsive.

The shoulder buttons, as they were raised about 1/2mm from the casing initially, have the paper on top directly; so pressing the button is also very responsive - feels nice.

I will use the method I used for the shoulder buttons for all the buttons on my next project - keeps things flat. I will also print the button images onto the paper, and colour them with the printer on the next project to make it look professional. This project was a final learning curve.


Buttons - flat, recessed, initially I wondered how good they would be, turns out they work great!

Image

One thing I did which was rather clever (as well as the screen rotation itself), was to make the GP2x controls different depending on whether the screen was landscape or portrait; for example, in portrait mode Left on D-pad is Left but in landscape mode is down; and the A and B buttons change with the volume + and - buttons. I achieve this switch automatically by using rotating cotton buds, making contact with tin foil:

Image


Finished system:

Image

Image

Image

...playing a game (Galaga90 on TurboGraphics) (old emulator, not tried the new one yet!)

Image

Screen rotation:

Reason? MAME old games like PacMan, Galaga, Pengo, Gorf, and others! (best played vertical and not horizontally).

Image

Image

Image


The system is comfortable to hold, buttons laid out so that A and B (used most often) are in the place my thumb rests; the shoulder buttons work well and located in logical places, the case is thick enough for adult hands to hold comfortably, unit is fairly light.

The only restriction is games in TV-out mode, most work excellently, especially as the PSone screen is 320 x 240 resolution (640 x 480i), emulators like Pictodrive (Megadrive), TurboGraphics, MAME and a host of other games look very nice.

I just need to put a couple of coats of clear varnish on the casing to protect it.

I have some other jobs to do at the moment around the house, including making a bookcase from scratch (I have other talents too!). I will start my new project tomorrow or Thursday....
Image

User avatar
gamemasterAS
Senior Member
Posts:3309
Joined:Thu Nov 24, 2005 10:30 pm
Steam ID:lolz1337face
Location:Ohio
Contact:

Post by gamemasterAS » Thu Feb 14, 2008 4:38 pm

I went to gp32x.com today and bam I see this on the homepage. I knew instantly it was yours. Yet again great work on it, everything you seem to pop out ends up very nice. Even though at times I don't like choices of yours like the buttons on this one ( come on, no beat2x? ).
.

User avatar
bacteria
Portablizer Extraordinaire
Posts:3984
Joined:Fri Apr 20, 2007 12:14 am
Location:Hampshire, UK
Contact:

Post by bacteria » Fri Feb 15, 2008 9:47 am

gamemasterAS - Thanks for your support and comments. Button placement is always a thorny issue. The ideal placement for buttons is at the bottom of the casing on both sides, however you can't hold the system that way very well and the screen keeps moving back and forth. Have the buttons at the top or mid section and you can hold the case comfortably and nicely but the sweet-spots to put buttons are not ideal. I figured that the games I play on the GP2x mostly use one or two buttons, some use three, can't think of any games using more I play (ignoring the LS and RS of course), so I figured make the buttons perfect for two buttons, fine for three. I'm not interested in fighting or dancemat games, so "combos" don't come into the equation. The "centre click" (top button) is only used to exit games in conjunction with other buttons, so speed to access it is not important (hence at the top).

I would be interested, from those people who posted on this thread, where they would have positioned the buttons - really - I would like to know for inspiration. Awaiting your ideas...
Image

Post Reply